Pages

Thursday, 17 July 2014

ARCHITECTURE DESIGN STUDIO 3 [ARC 2118]


Prroject 1a - PRECEDENT STUDIES: Analysing spatial poetics & spatial typologies in architecture.

This is the first project in semester 3 which requires a team of 5 peoples. We were required to select 2 precedent studies for analysis which one of it have to be a pre-modern building and another is a contemporary building. Also, one of the precedents must be in linear form and another must be in concentric form. For concentric, we had chosen NEW CHURCH IN FOLIGNO, SAN PAOLO PARISH COMPLEX BY FUKSAS ARCHITECTS as our contemporary building precedent study; for linear, we had chosen CHAITYA HALL OF KARLE CAVE, INDIA
(100-25 A.D) as our pre-modern building precedent study. Below are our presentation board of these two precedent studies.


Project 1b: The Journey of the 5 Senses

The next project, we had to use the design strategies we've learnt based on Project 1a to design a journey themed 'journey for the five senses'. We had to read on the given poetry and visualize it from an architectural viewport and translated the poetry into a journey by using 2 contrasting spatial typologies. The poem that we had chosen is ON DEATH by Kahlil Gibran.


These are the designs made by our team.


Concentric


Linear


Below are the presentation boards.


Project 2 - GENIUS LOCI: Sire Analysis & Concept Development


This project is an individual project. To do this project, we were required to visit the Labrador Park in Singapore. The purpose is to do an analysis regarding to the site and required to design a visitor interpretive centre at the site as our next project which is Project 3. At the site, we were asked to take some pictures and after the trip, we had to do an interpretation hand-sketches which bring inspirations to our design project. Besides, we also have to understand and record the historical background of this park such as its significant characteristics, sounds, texture, human features. The pictures below are the sketches that I've drawn and also presentation boards.


Project 3 - GENIUS LOCI: Visitor Interpretive Centre (VIC)
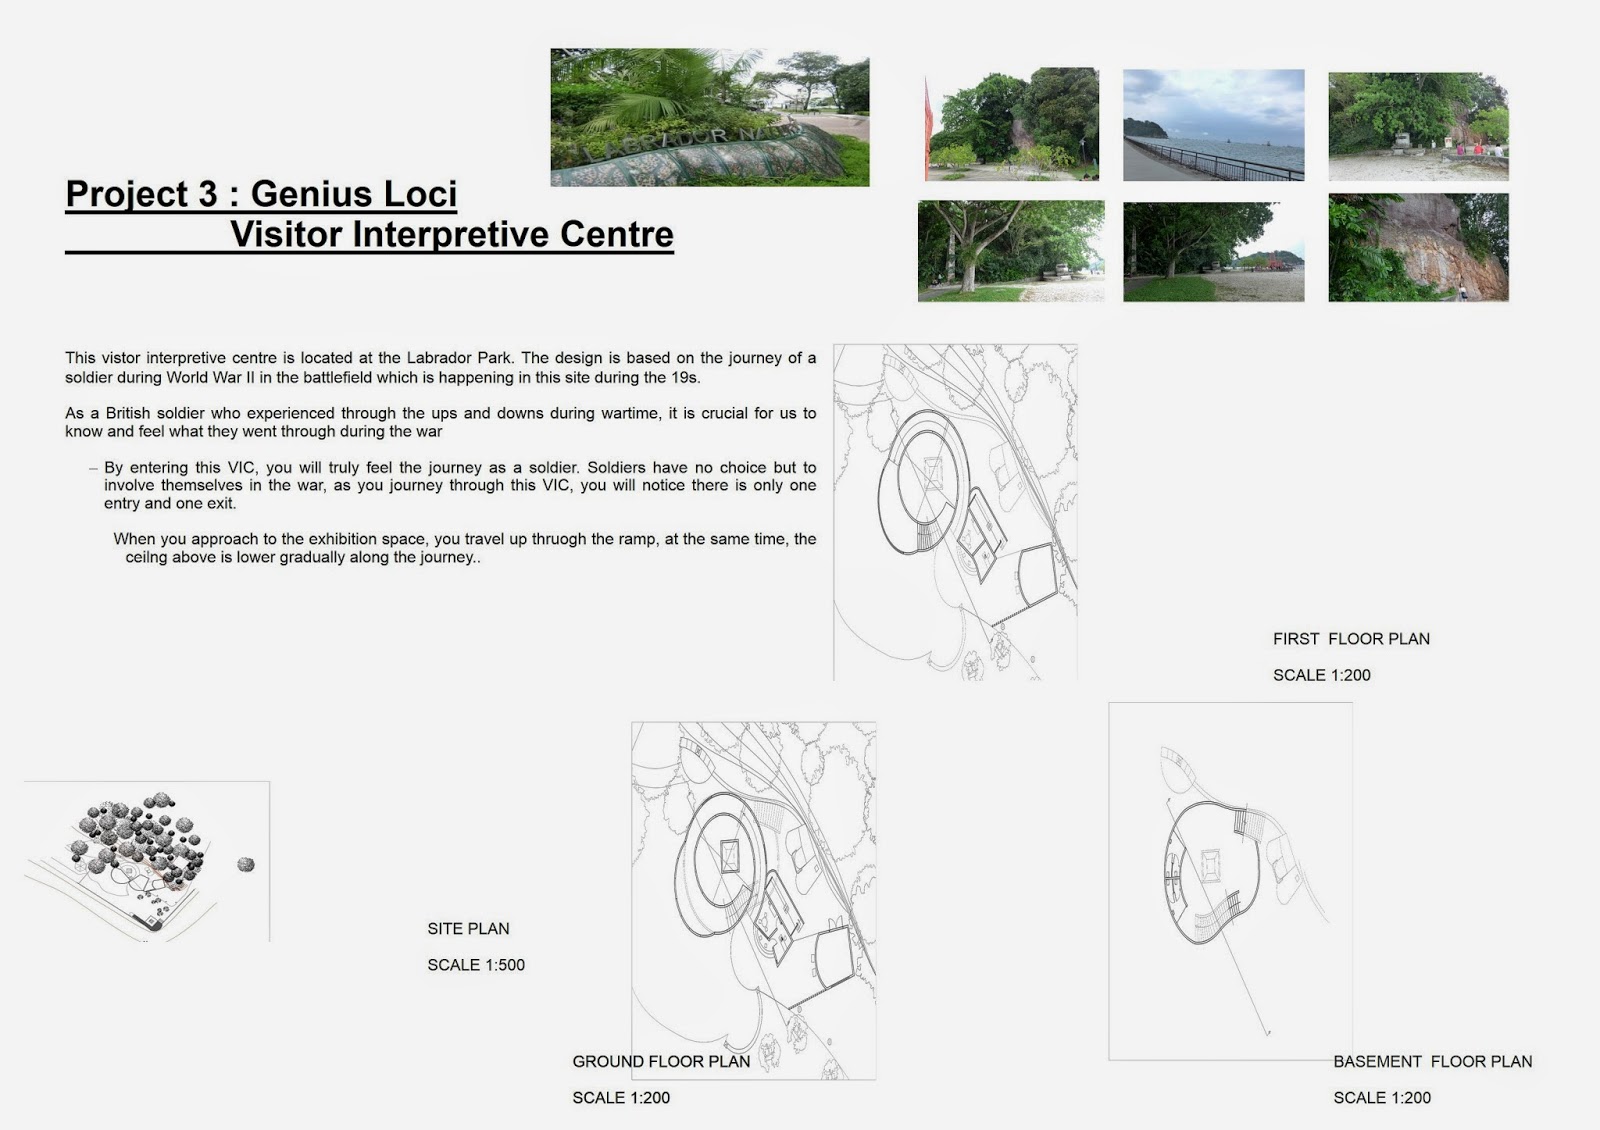

In this last project, we were required to design a 450m2 visitor interpretive centre at the site to provide a physical point of reference with visual significance that keeps alive the culture/history/memory/essence of the site and to provide accommodation to house and display relevant material and interpretive material for public access and information. 

Here is my presentation boards.


Monday, 14 April 2014

Computer Applications  [ ARC 2723 ]

Instructors: Koh Jing Hao (603-56295260; jinghao.koh@taylors.edu.my),

                   Angus Lee Ching Hua (603-56295250; chinghua.lee@taylors.edu.my) 


Project 1: Modelling of an Architectural Design 

In this first project, we were asked to choose one building from architecture magazines, books, websites or our previous Design Studio 2 Project which gather necessary information such as plan, elevations, sections and perspective drawings to produce a complete model by using 3DS Max or Rhinoceros or a combination of both. We were also required to create a blog or Facebook album for public access to upload The Work in Progress (WIP) print screens and test renderings to the above online platform regularly to show evidence of working progress to the instructors. 


I had chosen a one storey dwelling house named Pabellon-S from the website to produce a model by using Rhinoceros.


These are my working progress.


Firstly, I imported the floor plan of the house to Rhinoceros and began to trace it in the Top View. After tracing by using curves, I used the Join function to join all the curves together before extruding the curves.


In this step, I used the ExtrudeCrv function to extrude the joined curves up to a certain height which is 3 metres. I also used Layers function to create different layers in order to easily differentiate the walls, glasses,etc before I extrude them. I use layer with white colour to show the white wall; sky blue layer to show the glasses; brown layer to show timber as shown in the next steps.


After extruding all the joined curves, I started to work on the openings of the dwelling house. Firstly, I made a glass with a desirable height and extrude it thicker and insert into the wall. After that, I used Boolean Split to make a hole with the shape of the glass in order to enable me to insert the glass into the wall. Later, I deleted the unwanted thick part of the glass before I continue to the next step.


Similarly, I created the timber washroom space by using the same method from the previous steps. 


Next, I started to make floorings of this house by extruding the floor from the floor plan.


Since the house has different heights at certain parts, I used the method that I learned from the lectures which is, to create planes that can fully cover the whole house by initially use vertical curves to mark the different heights of the house and insert it until it cut through the house.


I used the planes as cutting objects to cut away unwanted parts of the house.


I used the Split function to separate the unwanted and wanted parts of the house by using the red planes as cutting objects. The highlighted yellow parts are the unwanted parts which was cut away by the planes.


The unwanted parts are deleted straight away.


This is the Perspective View of the house after being cut.


The planes were deleted after being used.


Here you can see the different heights of the house.


In this part, I started to create wooden deck of the house by changing the layer and then extrude it from the floor plan.


This is the wooden deck in Perspective View.


At the back of the house there are a series of glass, so, with the same method BooleanSplit or Split function, I made out holes from the wall and then enabled the glasses to insert into the wall.


Nevertheless, the ceiling of this house is created by tracing curves along the top of the walls and then extrude the joined curves.


These are the photos of the complete 3D model produced by Rhinoceros Software.


Five Renderings


Project 2a : Still Rendering with Materials, Lights, Camera Views with Site Context


Project 2b : Still Rendering with Materials, Lights, Camera Views with Site Context


Furnitures


Renderings, Two Eye-level views


Project 3: A Maximum 90 seconds Animation of the Completed 3D Scene 


Here is the 1minute and 30 seconds animation video produced :